一、JUC 并发编程
在 Java 编程中,线程并发是一个十分重要的模块,而 JUC 其实就是java.util .concurrent 工具包的简称 ,该工具包整合了 Java 中对于并发处理、优化等工具。其中包括了例如线程的创建与协调、原子类、Lock 锁、线程安全集合、辅助类等。
二、协调锁
在 JUC 中锁可以分为两块,一个是传统的 synchronized 锁,另一个则是实现 Lock 接口的锁。
1. Synchronized
synchronized 是 Java 中的关键字,是一种常见的同步锁。它可以修饰一个代码块,被修饰的代码块称为同步代码块,作用的对象是调用这个代码块的对象。如果后面括号括起来的部分是一个类,其作用锁的对象是这个类的所有对象。
synchronized (this){
    ...
}

synchronized (A.class){
    ...
}
还可以修饰一个方法,被修饰的方法称为同步方法,其作用的范围是整个方法,作用 的对象是调用这个方法的对象;
public synchronized void test() {
    ...
}
还可以修饰一个静态的方法,其作用的范围是整个静态方法,作用的对象是这个类的 所有对象;
public synchronized static void test() {
    ...
}
注意点:虽然可以使用 synchronized 来定义方法,但 synchronized 并不属于方法定 义的一部分,因此,synchronized 关键字不能被继承。如果在父类中的某个方法使用了synchronized 关键字,而在子类中覆盖了这个方法,在子类中的这个方法默认情况下并不是同步的,而必须显式地在子类的这个方法中加上synchronized 关键字才可以。当然,还可以在子类方法中调用父类中相应的方法,这样虽然子类中的方法不是同步的,但子类调用了父类的同步方法,因此,子类的方法也就相当于同步了。
2. Synchronized 锁下线程通信
如果一个代码块被 synchronized 修饰了,当一个线程获取了对应的锁,并执行该代码块时,其他线程便只能一直等待,其中要么获得锁的线程执行完了所有逻辑,正常释放锁,要么线程执行发生异常,由 JVM 自动释放锁,但是如果获得锁的线程需要等待某个时机,但一直不释放锁,其他线程能等待,肯定影响程序执行效率,因此线程间通信是必须的。在 Synchronized 锁的情况下,可以使用 wait()、notify() 、notifyAll() 进行通信,其中 wait() 表示挂起当前线程并释放锁,notify() 、notifyAll() 则唤醒被挂起的线程,这些都是Object 内置的方法
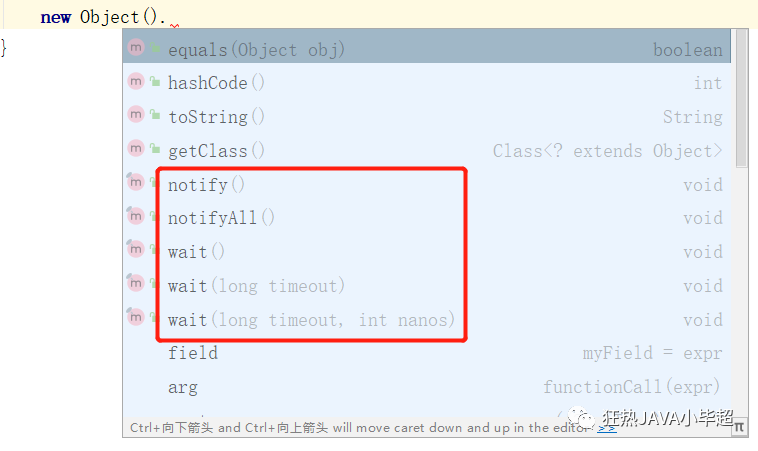
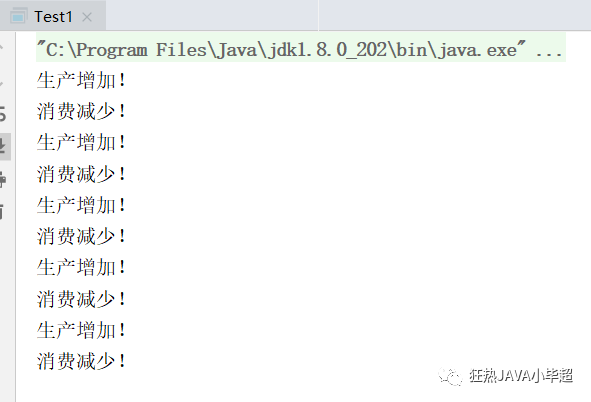
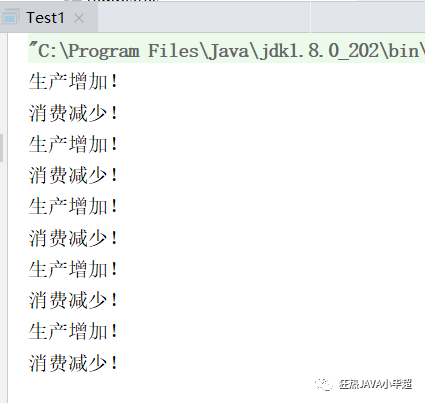
例如实现一个生产消费的场景,消费的前提是有产品,如果没有产品则释放锁等待,生产者则生产,如果有产品则等待消费者消费后再生产:
public class Test1 {
    private volatile int productNum;

    private synchronized void producer() {
        try {
            while (productNum != 0) {
                this.wait();
            }
            productNum++;
            System.out.println("生产增加!");
            notifyAll();
        } catch (Exception e) {
            e.printStackTrace();
        }
    }

    private synchronized void consumer() {
        try {
            while (productNum == 0) {
                this.wait();
            }
            productNum--;
            System.out.println("消费减少!");
            notifyAll();
        } catch (Exception e) {
            e.printStackTrace();
        }
    }

    public static void main(String[] args) {
        Test1 test1 = new Test1();
        new Thread(() -> {
            for (int i = 0; i < 5; i++) {
                test1.producer();
            }
        }, "线程 A").start();
        new Thread(() -> {
            for (int i = 0; i < 5; i++) {
                test1.consumer();
            }
        }, "线程 B").start();
    }
}
这里补充下 Join、Wait、Sleep之间的区别:
sleep(long):在睡眠时不释放对象锁。
join(long):先执行另外的一个线程,在等待的过程中释放对象锁 底层是基于wait封装的。
wait(long):在等待的过程中释放对象锁需要在我们synchronized中使用。
3. Lock 锁
Lock 锁实现提供了比使用 Synchronized 更广泛的锁操作。它们允许更灵活的结构,可能具有不同的属性,并且可能支持多个关联的条件对象。Lock 是一个Java 接口,并非 Java 的关键字,使用 Lock 锁 需要用户手动去上锁和释放锁,如果没有主动释放锁,就有可能导致出现死锁现象。
public interface Lock {
    // 获取锁
    void lock();
    // 可中断加锁,即在锁获取过程中不处理中断状态,而是直接抛出中断异常,由上层调用者处理中断。
    void lockInterruptibly() throws InterruptedException;
    // 尝试获取锁,并立即返回结果
    boolean tryLock();
    // 尝试获取锁,在一定时间范围内
    boolean tryLock(long time, TimeUnit unit) throws InterruptedException;
    // 释放锁
    void unlock();
    // 线程协调,通过它挂起、唤醒线程
    Condition newCondition();
}
注意:如果采用 Lock锁,必须主动去释放锁,并且在发生异常的情况下,是不会自动释放锁。所以使用 Lock 时,建议在 try 块中进行,并且在 finally 块中释放锁,以保证锁一定会被释放,防止死锁 。
其中在 Lock 接口中,提供了 newCondition() 方法获取一个 Condition 接口对象,该对象提供了 await()、signal() 方法,与 synchronized 的 wait()、notify() 方法类似,可以挂起、唤醒线程,不过 Condition 可以声明出多个,以分别应对不同的线程,进行针对性的挂起和唤醒。
Lock 对比 synchronized 在性能上来说,如果竞争资源不激烈,两者的性能差不多,当竞争资源非常激烈时, Lock 的性能要远远优于 synchronized 。
4. Lock 锁实例 – ReentrantLock
和 Synchronized 相同 ReentrantLock 为可重入锁,可通过 fair 参数决定当前是公平锁还是非公平锁,例如生产消费的场景实现:
public class Test1 {
    //可重入锁
    private Lock lock = new ReentrantLock(true);
    // 生产者的选择器
    private Condition producerCondition = lock.newCondition();
    // 消费者的选择器
    private Condition consumerCondition = lock.newCondition();

    private volatile int productNum;

    private void producer() {
        lock.lock();
        try {
            while (productNum != 0) {
                producerCondition.await();
            }
            productNum++;
            System.out.println("生产增加!");
            // 唤起消费者
            consumerCondition.signalAll();
        } catch (Exception e) {
            e.printStackTrace();
        } finally {
            lock.unlock();
        }
    }

    private void consumer() {
        lock.lock();
        try {
            while (productNum == 0) {
                consumerCondition.await();
            }
            productNum--;
            System.out.println("消费减少!");
            // 唤起生产者
            producerCondition.signalAll();
        } catch (Exception e) {
            e.printStackTrace();
        } finally {
            lock.unlock();
        }
    }

    public static void main(String[] args) {
        Test1 test1 = new Test1();
        new Thread(() -> {
            for (int i = 0; i < 5; i++) {
                test1.producer();
            }
        }, "线程 A").start();
        new Thread(() -> {
            for (int i = 0; i < 5; i++) {
                test1.consumer();
            }
        }, "线程 B").start();
    }
}
5. 读写锁 – ReadWriteLock
读写锁将操作读写分开成 2 个锁来分配给线程,在多个线程读的情况下,不受锁的控制,但是在写的情况下,只允许一个获得锁的线程来写,并且写的过程中读锁也在等待。
例如:
public class Test {
    private ReadWriteLock readWriteLock = new ReentrantReadWriteLock();
    private Lock readLock = readWriteLock.readLock();
    private Lock writeLock = readWriteLock.writeLock();

    public void read() {
        readLock.lock();
        try {
            Thread.sleep(1000);
            System.out.println(Thread.currentThread().getName() + "读操作,进行中!");
        } catch (Exception e) {
            e.printStackTrace();
        } finally {
            readLock.unlock();
        }
    }

    public void write() {
        writeLock.lock();
        try {
            System.out.println(Thread.currentThread().getName() + "写操作,进行中!");
            Thread.sleep(1000);
        } catch (Exception e) {
            e.printStackTrace();
        } finally {
            writeLock.unlock();
        }
    }

    public static void main(String[] args) {
        Test test = new Test();
        new Thread(() -> {
            for (int i = 0; i < 5; i++) {
                test.read();
            }
        }, "线程 A").start();
        new Thread(() -> {
            for (int i = 0; i < 5; i++) {
                test.read();
            }
        }, "线程 B").start();
        new Thread(() -> {
            for (int i = 0; i < 5; i++) {
                test.write();
            }
        }, "线程 C").start();
    }
}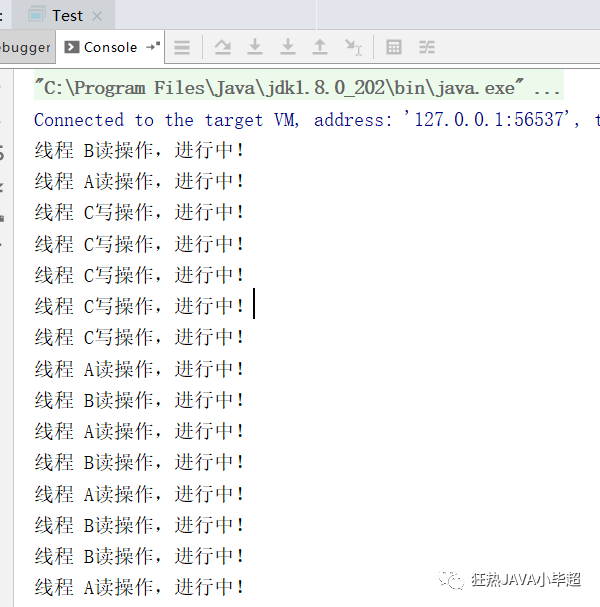
可以看出,当写锁执行时,读锁也会等待,写锁释放后,读锁不会阻塞。
三、CAS & 原子类
上面情况下的锁都属于悲观锁,当多个线程对争夺同一个锁时,最后只有一个线程才能获取成功,其余线程只能是阻塞等待,比如:MySQL中在更新一条数据时,事务未提交时,通过 for update 查询最新的数据,只能等待事务提交后方可查询。
而乐观锁比较乐观,通过预值或者版本号比较,进行 CAS ,如果不一致性的情况则通过循环控制修改,当前线程不会被阻塞,数据也没有加锁,因此性能比悲观锁要好。
比如下面的 SQL 语句:
update table set value='newValue', version=version+1 where id = 1 and version = 1; 1. CAS
Compare and Swap 的缩写,译为比较并交换,其中有三个主要的参数 CAS(V,E, N),内存值V,旧的预期值E,要修改的新值N, 在将值由 V 更新为 N 时,先进行 E == V 判断,如果成立则更新 V 的值为 N ,否则什么都不做。一般通过自旋操作控制不成立的情况,则重新计算 N 值,并将当前的 V 值赋予 E 值 ,重新判断。
但这种情况有可能会遇到 ABA 的问题,就是原来的值为 A,此时有线程改为了 B,B 又改为了A ,此时如果某个线程中的旧值还是 A,会感知不到中间发生的变化,解决该问题,可以通过增加版本号,每次修改对版本号加一,后面进行版本号的对比。
CAS 也不是没有缺点,如果长时间不成功,一直处于自旋状态,会给CPU带来非常大的执行开销。而悲观锁就不会给 CPU 带来很大的开销,但会带来比较多的上下文切换。
CAS 的过程需要保证原子性,在 Java 中通过 unsafe jni 技术使用硬件指令来实现。
在 Java 中通过该技术实现了一批类,可以让我们无需关注底层的CAS过程。
2. 原子类
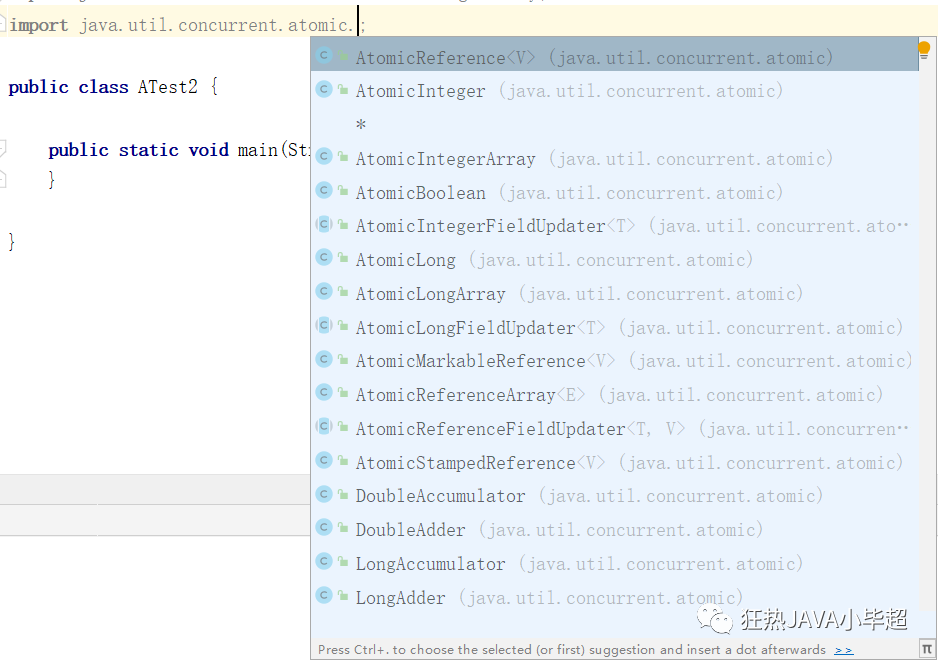
原子类是 java.util.concurrent.atomic 包下的类,在多线程情况下通过 CAS 无锁机制进行数据的更新。
2.1 基础原子类
原子类中提供了基础类型的类:AtomicInteger、AtomicBoolean、AtomicLong,可以直接开箱即用,以 AtomicInteger 为例,其中常用的 API 如下:
// 获取当前值。
public final int get()
// 获取当前值,并将当前值设置为新值
public final int getAndSet(int newValue)
// 获取当前值,并将当前值 +1
public final int getAndIncrement()
// 将当前值 +1 ,获取当前值
public final int incrementAndGet()
// 获取当前值,并将当前值 -1
public final int getAndDecrement()
 // 将当前值 -1 ,获取当前值
public final int decrementAndGet()
// 获取当前值,并将当前值 + delta
public final int getAndAdd(int delta)
// 将当前值 + delta , 获取当前值
public final int addAndGet(int delta)
// 如果当前值==为预期值,则将该值设置为给定的新值。
public boolean comapreAndSet(int expect,int update)
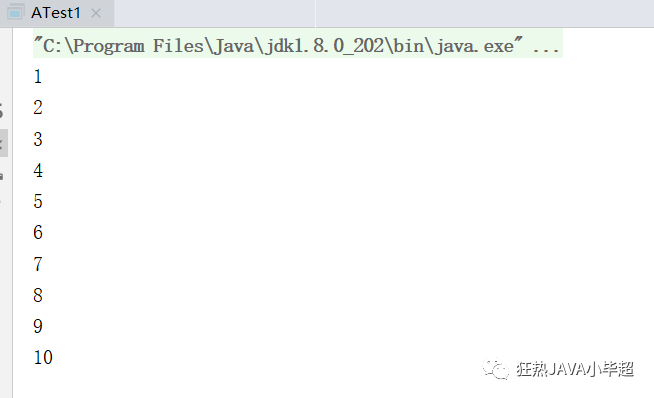
例如当多个线程对一个变量进行操作时,会出现线程安全问题,现在换成原子类,进行测试下,当两个线程对一个变量进行 +1:
public class ATest1 {

    public static void main(String[] args) {
        AtomicInteger productNum = new AtomicInteger(0);
        new Thread(() -> {
            for (int i = 0; i < 5; i++) {
                System.out.println(productNum.incrementAndGet());
            }
        }, "线程 A").start();
        new Thread(() -> {
            for (int i = 0; i < 5; i++) {
                System.out.println(productNum.incrementAndGet());
            }
        }, "线程 B").start();
    }

}
2.2 数组类型原子类
原子类中数组类型的原子类有:AtomicIntegerArray、AtomicLongArray、AtomicRreferenceArray,相比于基础类型,在数据操作时,需要传入数据的下标。
AtomicIntegerArray atomicIntegerArray = new AtomicIntegerArray(10);
// 第 0 个位置的数据,+ 10
atomicIntegerArray.getAndAdd(0,10);
2.3 引用型原子类
上面的类型都是指定类型的, 在实际开发中会遇到各种各样的类型,为此为我们提供了引用型原子类,AtomicReference<V> ,例如实现一个 String 类型的原子类:
AtomicReference<String> atomicReference = new AtomicReference<>("");
//设置数据
atomicReference.set("abc");
//获取数据
System.out.println(atomicReference.get());
四、线程
创建线程上面使用了,直接创建 Thread 类的方式,在刚开始学习线程时,还有一种通过使用 Runnable 创建线程,这些基本的方式这里就不做介绍了,这里主要介绍两个,Callable & Future、线程池。
1. Callable 和 Future
上面创建线程的方式都拿不到线程返回的结果,为了支持此功能,Java 中提供了 Callable 接口 和 Future 接口。
对于 Callable,需要通过 call()方法返回线程的结果,如:
Callable<String> callable = () -> {
    System.out.println(Thread.currentThread().getName() + " 执行了");
    return "success";
};
不过 call() 返回的结果需要存储在主线程已知的对象中,以便主线程可以知道该线程返回的结果。此时就需要用到 Future 对象,Future 可以视为保存结果的对象,它可能暂时不保存结果,但将来会保存(一旦Callable 返回),Future 基本上是主线程可以跟踪进度以及其他线程的结果的一种方式。
public class Test2 {
    public static void main(String[] args) throws Exception {
        Callable<String> callable = () -> {
            System.out.println(Thread.currentThread().getName() + " 执行了");
            return "success";
        };
        FutureTask<String> future = new FutureTask<>(callable);
        new Thread(future,"A").start();
        String call = future.get();
        System.out.println(call);
    }
}
2. 线程池
在项目中,线程池通常是大家必备的工具,具有线程复用、资源限制、使用灵活等优点。
线程池,可以使用 Java 提供的 Executors 工具快速创建线程池,但是像阿里巴巴开发规范手册中有提到,尽量不要使用 Executors 工具创建线程池,由于其默认的参数使用了 Integer.MAX_VALUE,例如 newFixedThreadPool 和 newSingleThreadExecutor 中 LinkedBlockingQueue 的容量默认是 Integer.MAX_VALUE,newCachedThreadPool 和 newScheduleThreadPool 中的允许创建最大线程数量为Integer.MAX_VALUE。
因此在实际项目中,还是老老实实用 ThreadPoolExecutor,或者用 spring 的 ThreadPoolTaskExecutor。
在使用线程池前先了解下线程池的执行过程:
- • 新的线程请求进来时,会先判断核心线程数是否已满,如果未满则直接新建线程并执行,执行完将其放回线程池;
- • 如果已满就再检查队列是否已满,如果没满就将当前线程请求加入阻塞队列,等待空闲线程分配;
- • 如果已满就再检查线程池当前存在的线程数是否已达到规定的最大值,如果没有达到就创建线程执行;
- • 如果达到就执行对应的饱和策略。
了解了执行过程就好理解下面线程池的参数了:
- •
corePoolSize:指定了线程池中的线程数量,它的数量决定了添加的任务是开辟新的线程去执行,还是放到workQueue任务队列中去; - •
maximumPoolSize:指定了线程池中的最大线程数量,这个参数会根据你使用的workQueue任务队列的类型,决定线程池会开辟的最大线程数量; - •
keepAliveTime:当线程池中空闲线程数量超过corePoolSize时,多余的线程会在多长时间内被销毁; - •
unit:keepAliveTime的单位 - •
workQueue:任务队列,被添加到线程池中,但尚未被执行的任务;它一般分为直接提交队列、有界任务队列、无界任务队列、优先任务队列几种; - •
threadFactory:线程工厂,用于创建线程,一般用默认即可; - •
handler:拒绝策略;当任务太多来不及处理时,如何拒绝任务;
其中 workQueue 队列一般分为直接提交队列、有界任务队列、无界任务队列、优先任务队列等:
- • 直接提交队列:是一个特殊的
BlockingQueue,它没有容量,没执行一个插入操作就会阻塞,需要再执行一个删除操作才会被唤醒,反之每一个删除操作也都要等待对应的插入操作。new SynchronousQueue<Runnable>() - • 有界的任务队列:有界的任务队列
new ArrayBlockingQueue<Runnable>(10) - • 无界的任务队列:LinkedBlockingQueue可以作为无界也可以作为有界
new LinkedBlockingQueue<Runnable>(), - • 优先任务队列:优先任务队列会按照线程的优先级进行了重新排列执行。
new PriorityBlockingQueue<Runnable>()
其中 handler 拒绝策略可以选择:
- •
AbortPolicy策略:该策略会直接抛出异常,阻止系统正常工作; - •
CallerRunsPolicy策略:如果线程池的线程数量达到上限,该策略会把任务队列中的任务放在调用者线程当中运行; - •
DiscardOledestPolicy策略:该策略会丢弃任务队列中最老的一个任务,也就是当前任务队列中最先被添加进去的,马上要被执行的那个任务,并尝试再次提交; - •
DiscardPolicy策略:该策略会默默丢弃无法处理的任务,不予任何处理。当然使用此策略,业务场景中需允许任务的丢失;
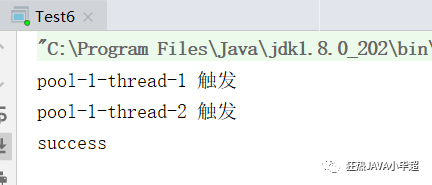
使用案例:
public class Test6 {
    public static void main(String[] args) throws ExecutionException, InterruptedException {
        ThreadPoolExecutor executor = new ThreadPoolExecutor(
                5, //核心线程数
                10, //最大线程数
                3, //线程保持时间
                TimeUnit.SECONDS, //线程保持时间单位
                new LinkedBlockingDeque<>(10), //线程缓存队列
                new ThreadPoolExecutor.CallerRunsPolicy()); //拒绝策略
        // 无返回的线程
        executor.execute(()->{
            System.out.println(Thread.currentThread().getName()+" 触发");
        });
        // 获取线程返回值
        Future<String> submit = executor.submit(() -> {
            System.out.println(Thread.currentThread().getName()+" 触发");
            return "success";
        });
        System.out.println(submit.get());
         //关闭线程池
        executor.shutdown();
    }
}
3. 安全停止线程
停止一个正在运行的线程,可以通过 stop 或 Interrupt 方式,不过两者有着较大的区别:
Stop:中止线程,并且清除监控器锁的信息,但是可能导致线程安全问题,JDK中不建议使用。
Interrupt: 打断正在运行或者正在阻塞的线程。如果目标线程在使用用Object 的 wait、join 或者 sleep 方法时被阻塞,那么使用 Interrupt中止,该线程的中断状态将被清除,并抛出InterruptedException异常。如果目标线程是被I/O或者NIO中的Channel所阻塞,同样,I/O操作会被中断或者返回异常值,以此达到终止线程的目的。如果以上条件都不满足,则会设置此线程为中断状态。
五、JUC 辅助类
1. CountDownLatch
CountDownLatch 类似于一个计数器,通过 countDown 方法进行减一,通过 await 方法,等待计数器等于 0 ,如果依然大于 0 此时当前线程会被阻塞,当等于 0 时继续向下执行。
例如,还是上面的案例,当生产者生产了 6 个商品后,消费者才能消费:
public class Test3 {
    private CountDownLatch countDownLatch = new CountDownLatch(6);

    private volatile int productNum;

    private void producer() {
        productNum++;
        System.out.println("生产增加: " + productNum);
        countDownLatch.countDown();
    }

    private void consumer() {
        try {
            countDownLatch.await();
            productNum--;
            System.out.println("消费减少: " + productNum);
        } catch (InterruptedException e) {
            e.printStackTrace();
        }
    }

    public static void main(String[] args) {
        Test3 test1 = new Test3();
        new Thread(() -> {
            for (int i = 0; i < 6; i++) {
                test1.producer();
            }
        }, "线程 A").start();
        new Thread(() -> {
            for (int i = 0; i < 6; i++) {
                test1.consumer();
            }
        }, "线程 B").start();
    }
}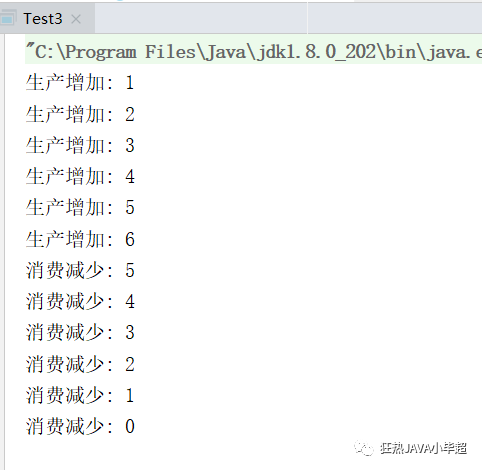
可以看出,当 countDownLatch 不为 0 时,会一直阻塞当前线程。
2. CyclicBarrier
循环栅栏,和 CountDownLatch 可以反过来,当 await() 的数量达到某个值,则触发逻辑,await() 不会阻塞当前线程,而是做了加一操作,如:
public class Test4 {

    public static void main(String[] args) throws BrokenBarrierException, InterruptedException {
        CyclicBarrier cyclicBarrier = new CyclicBarrier(2, () -> {
            System.out.println("我触发啦!");
        });
        new Thread(() -> {
            try {
                System.out.println(Thread.currentThread().getName() + "执行!");
                cyclicBarrier.await();
            } catch (Exception e) {
                e.printStackTrace();
            }
        }, "A").start();
        new Thread(() -> {
            try {
                System.out.println(Thread.currentThread().getName() + "执行!");
                cyclicBarrier.await();
            } catch (Exception e) {
                e.printStackTrace();
            }
        }, "B").start();
    }

}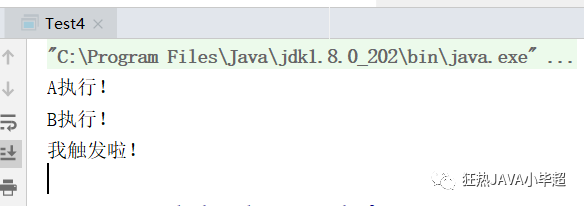
指定的 cyclicBarrier 为 2 ,当 A、B 两个线程触发后,正好 await() 后为 2 ,所以CyclicBarrier 中的 Runable 在最后触发。
3. Semaphore
信号量,可以通过设置一个固定数值的信号量,线程通过 acquire() 获取一个信号量,通过 release() 释放当前的信号量,当信号量为 0 时, acquire() 方法会被阻塞,知道其他线程释放了信号量,可以空值线程的并发数。
例如:
public class Test5 {

    public static void main(String[] args) {
        Semaphore semaphore = new Semaphore(3);
        for (int i = 0; i < 10; i++) {
            new Thread(() -> {
                try {
                    semaphore.acquire();
                    System.out.println("线程:" + Thread.currentThread().getName() + " 执行, 当前时间:" + LocalDateTime.now().toString());
                    Thread.sleep(1000);
                } catch (Exception e) {
                    e.printStackTrace();
                } finally {
                    semaphore.release();
                }
            }, String.valueOf(i)).start();
        }
    }

}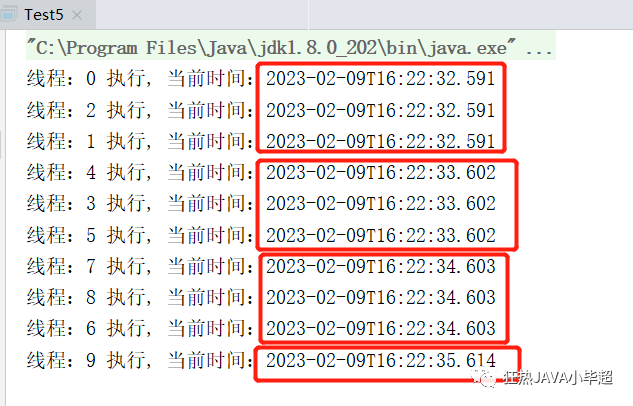
可以看到每次都是 3 个线程并发,这里和 Lock 锁一样值得注意的是release()尽量放在finally中执行,以避免异常错误导致信号量无法释放。
六、队列
1. BlockingQueue
阻塞队列,数据由队列的一端输入,从另外一端输出,当队列是空的,从队列中获取元素的操作将会被阻塞,直到其他线程往空的队列插入新的元素。当队列是满的,从队列中添加元素的操作将会被阻塞,直到其他线程从队列中移除。
BlockingQueue 的核心方法如下:
| 类型 | 不符合条件时抛出异常 | 返回操作状态 | 阻塞当前线程 | 超时 |
| 添加数据 | add(e) | offer(e) | put(e) | offer(e,time,unit) |
| 移除数据 | remove() | poll() | take() | poll(time,unit) |
| 检查数据 | element() | peek() | 无 | 无 |
其中: 不符合条件时抛出异常表示,当队列满时,继续添加会抛出异常,同理当队列为空时,移除会抛出异常。 返回操作状态表示,当队列满时,继续添加则返回 false ,当队列为空时移除会返回 null 。 阻塞当前线程表示,当队列满时,继续添加会阻塞,反之继续移除会阻塞。 超时表示,一定时间内等不到结果会退出。
2. 队列的选择
2.1 ArrayBlockingQueue
基于数组的阻塞队列实现, 内部维护了一个定长数组,以便缓存队列中的数据对象,同时内部还保存着两个整数形变量,分别表示着队列的头部和尾部在数组中的位置。ArrayBlockingQueue 的读写都是共用同一个锁对象,也表示两者无法并行运行。在声明 ArrayBlockingQueue 时可以通过 fair 参数指定锁的类型是公平锁还是非公平锁。
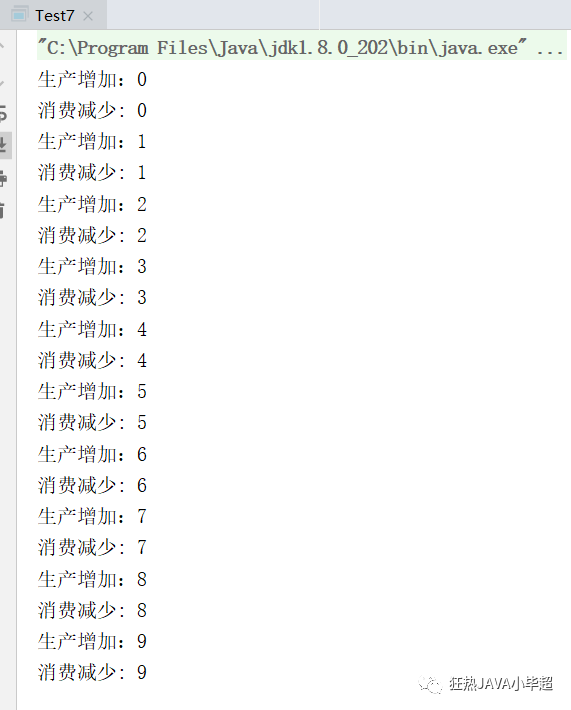
例如使用队列实现,上面的生产消费场景:
public class Test7 {

    BlockingQueue<String> blockingQueue = new ArrayBlockingQueue<>(5);

    private void producer(int i) {
        try {
            blockingQueue.put(String.valueOf(i));
            System.out.println("生产增加:" + i);
        } catch (InterruptedException e) {
            e.printStackTrace();
        }
    }

    private void consumer() {
        try {
            String take = blockingQueue.take();
            System.out.println("消费减少: " + take);
        } catch (InterruptedException e) {
            e.printStackTrace();
        }
    }

    public static void main(String[] args) {
        Test7 test7 = new Test7();
        new Thread(() -> {
            for (int i = 0; i < 10; i++) {
                test7.producer(i);
            }
        }, "线程 A").start();
        new Thread(() -> {
            for (int i = 0; i < 10; i++) {
                test7.consumer();
            }
        }, "线程 B").start();
    }

}
2.2 LinkedBlockingQueue
基于链表的阻塞队列,同 ArrayListBlockingQueue 类似,其内部也维持着一个基于链表形式的缓冲队列 ,和 ArrayListBlockingQueue在于锁的区别,LinkedBlockingQueue 对于生 产者端和消费者端分别采用了独立的锁来控制数据操作,这也意味着能够高效的处理并发数据。
2.3 DelayQueue
延时队列,只有当其指定的延迟时间到了,才能够从队列中获取到该元素。DelayQueue 是一个没有大小限制的队列,因此往队列中插入数据时不会被阻塞,当获取数据操作时会出现阻塞情况。
public class Test8 {

    @Data
    static class DelayedTask implements Delayed {

        private String message;
        private Long time;

        public DelayedTask(String message, Long time) {
            this.message = message;
            this.time = time;
        }

        @Override
        public long getDelay(TimeUnit unit) {
            return time - System.currentTimeMillis();
        }

        @Override
        public int compareTo(Delayed o) {
            if (!(o instanceof DelayedTask))
                return 1;
            if (o == this)
                return 0;
            DelayedTask task = (DelayedTask) o;
            return this.time.compareTo(task.time);
        }
    }

    public static void main(String[] args) {
        DelayQueue<DelayedTask> delayQueue = new DelayQueue();
        // 消费
        new Thread(() -> {
            try {
                while (true){
                    DelayedTask take = delayQueue.take();
                    System.out.println(take.message + " 消费时间:" + formatDate(System.currentTimeMillis()));
                }
            } catch (InterruptedException e) {
                e.printStackTrace();
            }
        }).start();
        delayQueue.put(new DelayedTask("消息1 , 1 秒后触发,发送时间:" + formatDate(System.currentTimeMillis()), System.currentTimeMillis() + 1000));
        delayQueue.put(new DelayedTask("消息2 , 3 秒后触发,发送时间:" + formatDate(System.currentTimeMillis()), System.currentTimeMillis() + 3000));
        delayQueue.put(new DelayedTask("消息3 , 10 秒后触发,发送时间:" + formatDate(System.currentTimeMillis()), System.currentTimeMillis() + 10000));
        delayQueue.put(new DelayedTask("消息4 , 30 秒后触发,发送时间:" + formatDate(System.currentTimeMillis()), System.currentTimeMillis() + 30000));
    }

    private static String formatDate(Long date) {
        return new SimpleDateFormat("HH:mm:ss").format(new Date(date));
    }
}
2.4 PriorityBlockingQueue
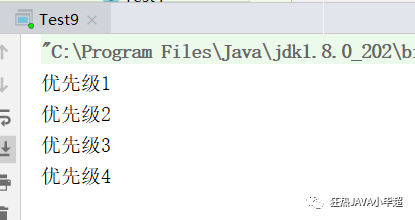
基于优先级的阻塞队列,优先级的判断通过构造函数传入的 Compator 对象来决定,PriorityBlockingQueue 也是一个没有大小限制的队列,不会阻塞数据生产者,但是在没有任何数据的情况下,会阻塞数据的消费者。PriorityBlockingQueue 内部默认使用公平锁来控制数据。
public class Test9 {

    public static class Task implements Comparable<Task> {
        String message;
        Long priority;

        public Task(String message, Long priority) {
            this.message = message;
            this.priority = priority;
        }

        @Override
        public int compareTo(Task o) {
            return this.priority.compareTo(o.priority);
        }
    }

    public static void main(String[] args) {
        PriorityBlockingQueue<Task> queue = new PriorityBlockingQueue();
        queue.put(new Task("优先级4", 4L));
        queue.put(new Task("优先级2", 2L));
        queue.put(new Task("优先级1", 1L));
        queue.put(new Task("优先级3", 3L));
        // 消费
        new Thread(() -> {
            try {
                while (true) {
                    Task take = queue.take();
                    System.out.println(take.message);
                }
            } catch (InterruptedException e) {
                e.printStackTrace();
            }
        }).start();
    }
}
2.5 SynchronousQueue
无缓冲的等待队列,生产者和消费者直接对立关系,如果只有生产者,没有消费者则生产者等待,反之消费者等待。SynchronousQueue 有两种不同的方式:
- • 公平模式:使用一个
FIFO队列来阻塞多余的生产者和消费者,从而体系整体的公平策略。 - • 非公平模式,使用非公平锁,配合一个
LIFO队列来管理多余的生产者和消费者, 这种情况下如果生产者和消费者的处理速度有差距,则很容易出现饥渴的情况,即可能有某些生产者或者是消费者的数据永远都得不到处理。
例如下面的案例,当生产者的数量大于消费者的数量时:
public class Test10 {

    public static void main(String[] args) {
        SynchronousQueue queue = new SynchronousQueue(true);
        // 生产1
        new Thread(() -> {
            try {
                for (int i = 0; i < 5; i++) {
                    queue.put("生产者1的消息:" + i);
                    System.out.println("生产者1的消息:" + i + "已发出!");
                }
            } catch (Exception e) {
                e.printStackTrace();
            }
        }).start();
        // 生产2
        new Thread(() -> {
            try {
                for (int i = 0; i < 5; i++) {
                    queue.put("生产者2的消息:" + i);
                    System.out.println("生产者2的消息:" + i + "已发出!");
                }
            } catch (Exception e) {
                e.printStackTrace();
            }
        }).start();
        // 消费
        new Thread(() -> {
            try {
                for (int i = 0; i < 5; i++) {
                    Object take = queue.take();
                    System.out.println("消费:" + take);
                }
            } catch (Exception e) {
                e.printStackTrace();
            }
        }).start();
    }
}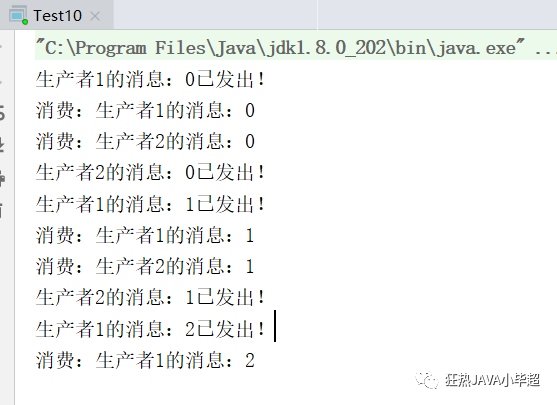
可以看出当消费者用完时,生产者找不到消费者便会等待。
2.6 LinkedTransferQueue
由链表结构组成的无界阻塞 TransferQueue 队列,相比其他队列多了 tryTransfer 和 transfer 方法,LinkedTransferQueue 在消费者获取数据时,如果队列为空,则生成一个 null 放入队列中占取位置,并阻塞当前线程,当生产者添加数据时,如果发现有 null 的数据,则更新为新的数据,并唤醒消费者。一定程度上可以保证消费的顺序。
public class Test11 {

    public static void main(String[] args) {
        LinkedTransferQueue queue = new LinkedTransferQueue();
        // 消费
        new Thread(() -> {
            try {
                for (int i = 0; i < 5; i++) {
                    Object take = queue.take();
                    System.out.println("消费:" + take);
                }
            } catch (Exception e) {
                e.printStackTrace();
            }
        }).start();

        // 生产
        new Thread(() -> {
            try {
                for (int i = 0; i < 5; i++) {
                    queue.put("生产者的消息:" + i);
                }
            } catch (Exception e) {
                e.printStackTrace();
            }
        }).start();
    }
}
2.7 LinkedBlockingDeque
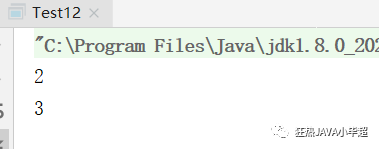
由链表结构组成的双向阻塞队列,可以从队列的两端插入和移除元素。写入元素时,如果队列已满则阻塞,反之消费阻塞。
public class Test12 {

    public static void main(String[] args) throws InterruptedException {
        LinkedBlockingDeque<String> deque = new LinkedBlockingDeque(3);
        deque.push("1");
        deque.addFirst("2");
        deque.addLast("3");
        //消费第一个
        System.out.println(deque.takeFirst());
        //消费最后一个
        System.out.println(deque.takeLast());
    }
}
 微信赞赏
微信赞赏 支付宝扫码领红包

