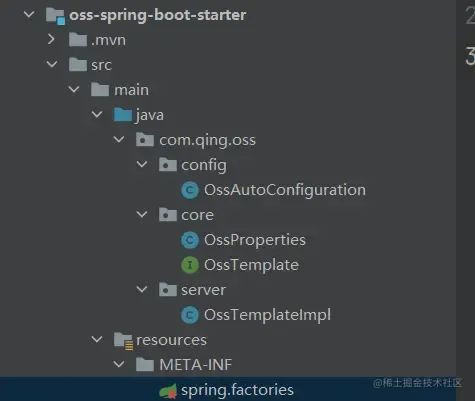
minio企业级的 oss-spring-boot-starter
本文主要讲解企业级 OSS 对象存储服务 Spring Boot Starter 制作,开箱即用,为项目进行赋能。基于 AmazonS3 协议,适配市面上的对象存储服务如:阿里云 OSS、腾讯 COS、七牛云 OSS、MInio 等等。
什么是 OSS?
OSS(Object Storage Service),对象存储服务,对象存储服务是一种使用 HTTP API 存储和检索对象的工具。就是将系统所要用的文件上传到云硬盘上,该云硬盘提供了文件下载、上传、预览等一系列服务,具备版本,权限控制能力,具备数据生命周期管理能力这样的服务以及技术可以统称为 OSS
OSS 对象存储在目前大部分项目中必不可少的存在,如下图所示。

-
一般项目使用 OSS 对象存储服务,主要是对图片、文件、音频等对象集中式管理权限控制,管理数据生命周期等等,提供上传,下载,预览,删除等功能。 -
通过 OSS 部署前端项目。
什么是 AmazonS3?
Amazon Simple Storage Service(Amazon S3,Amazon 简便存储服务)是 AWS 最早推出的云服务之一,经过多年的发展,S3 协议在对象存储行业事实上已经成为标准。
-
提供了统一的接口 REST/SOAP 来统一访问任何数据 -
对 S3 来说,存在里面的数据就是对象名(键),和数据(值) -
不限量,单个文件最高可达 5TB,可动态扩容。 -
高速。每个 bucket 下每秒可达 3500 PUT/COPY/POST/DELETE 或 5500 GET/HEAD 请求。 -
具备版本,权限控制能力 -
具备数据生命周期管理能力
文档地址:https://docs.aws.amazon.com/zh_cn/AmazonS3/latest/userguide/Welcome.html
作为一个对象存储服务,S3 功能真的很完备,行业的标杆,目前市面上大部分 OSS 对象存储服务都支持 AmazonS3,本文主要讲解的就是基于 AmazonS3 实现我们自己的 Spring Boot Starter。
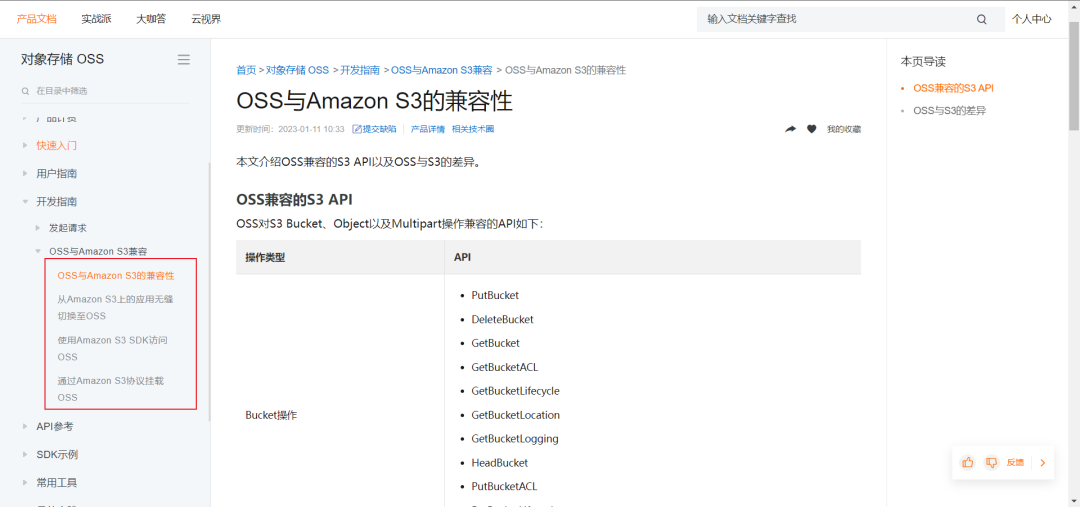
阿里云 OSS 兼容 S3
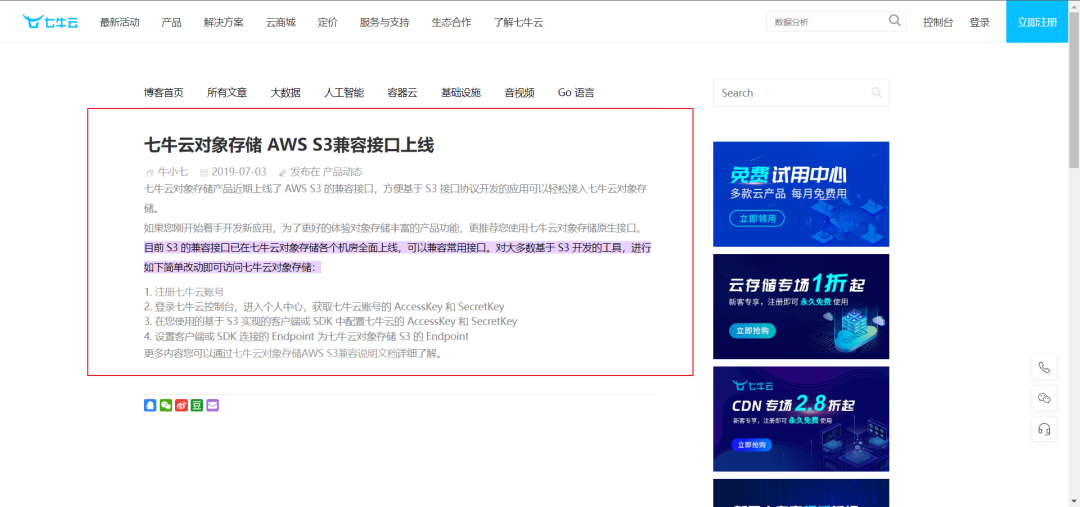
七牛云对象存储兼容 S3
腾讯云 COS 兼容 S3

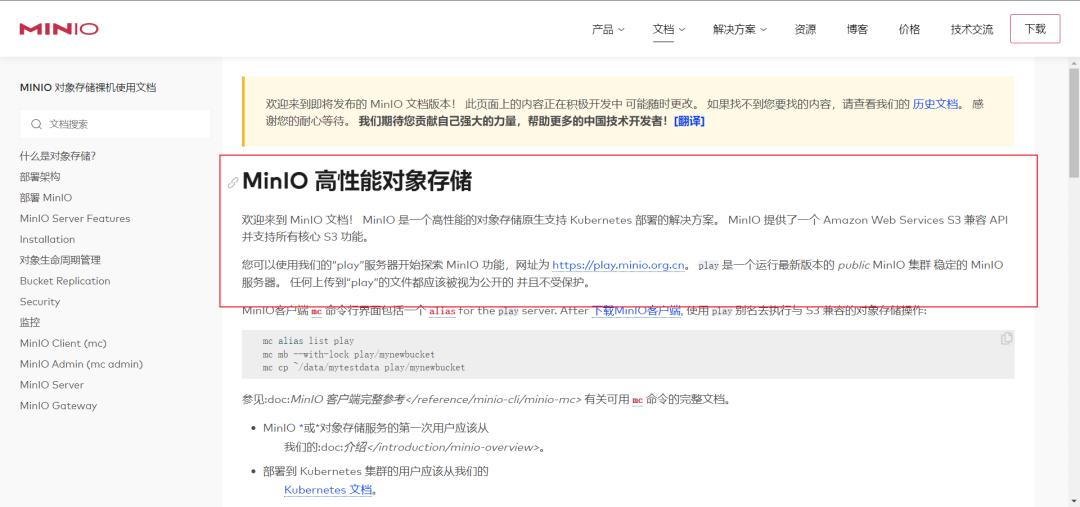
Minio 兼容 S3
我们为什么要基于AmazonS3 实现 Spring Boot Starter?
原因:市面上 OSS 对象存储服务基本都支持 AmazonS3,我们封装我们的自己的 starter 那么就必须考虑适配,迁移,可扩展。比喻说我们今天使用的是阿里云 OSS 对接阿里云 OSS 的 SDK,后天我们使用的是腾讯 COS 对接是腾讯云 COS,我们何不直接对接 AmazonS3 实现呢,这样后续不需要调整代码,只需要去各个云服务商配置就好了。
实战
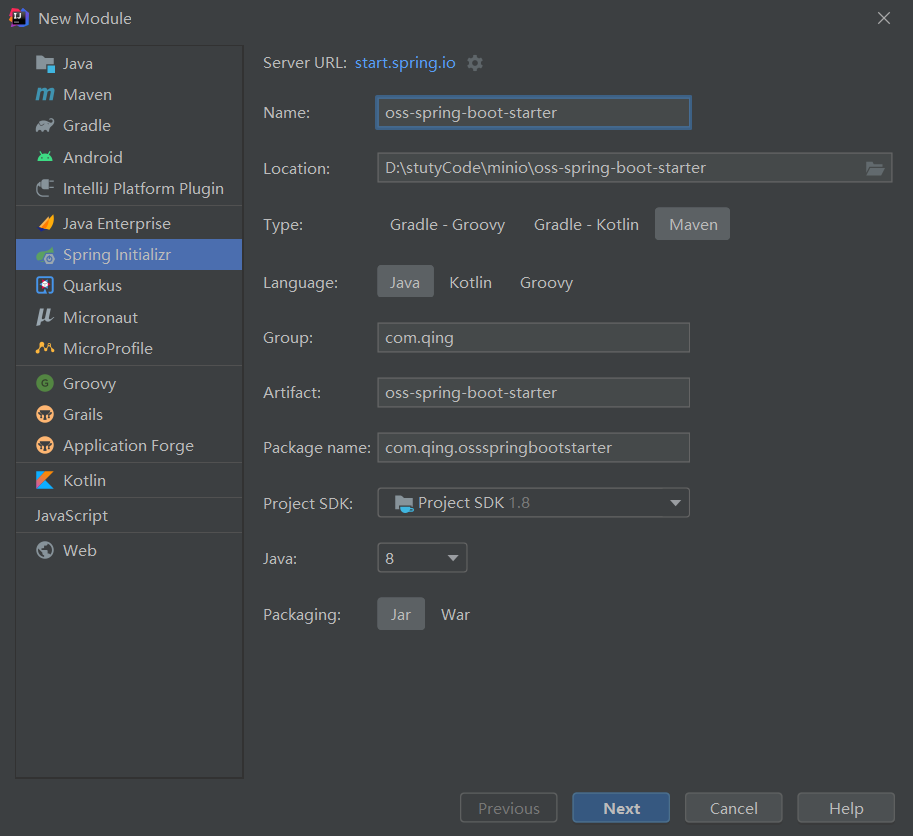
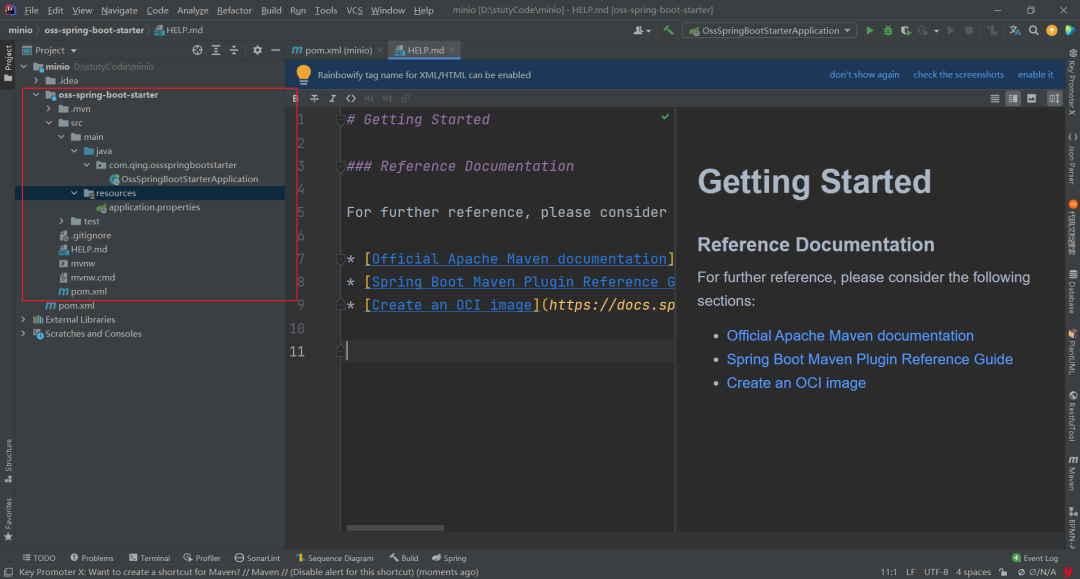
创建一个 SpringBoot 项目
如下图所示:创建一个 SpringBoot 项目。
我们取名为 oss-spring-boot-starter。
如下图所示,创建成功,让我们进入制作的过程吧。
找到我们需要的依赖
打开 maven 仓库,搜索 minio
地址: https://mvnrepository.com/ 。
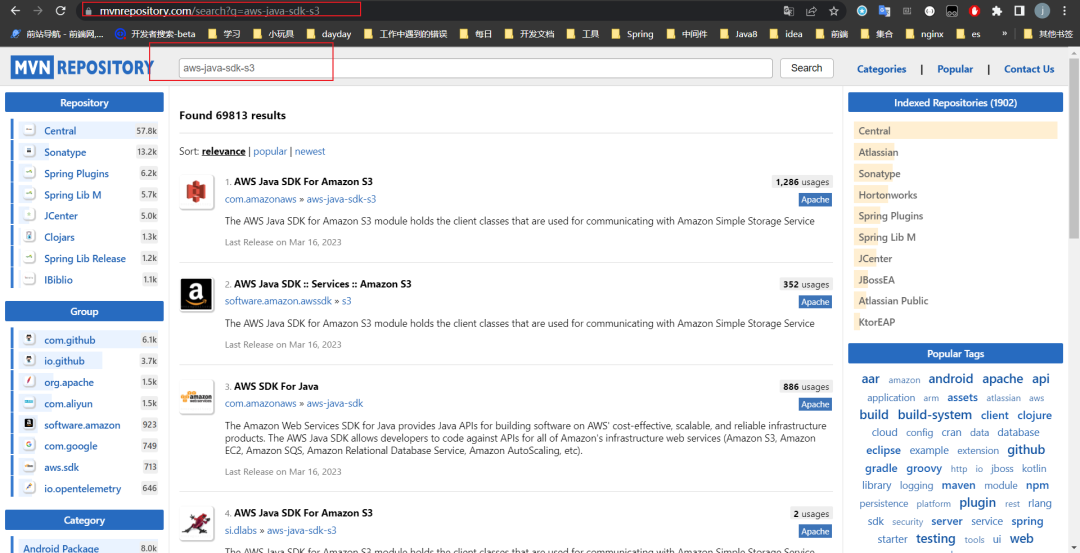
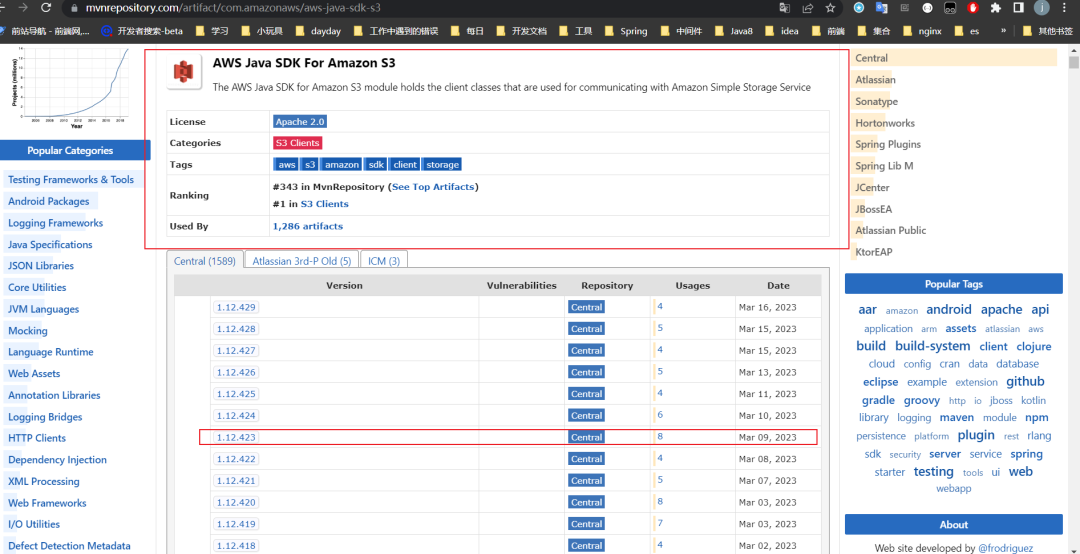
这里我们选择第一个,点进去后我们选择 1.12.423 版本,做演示。
<!-- https://mvnrepository.com/artifact/com.amazonaws/aws-java-sdk-s3 -->
<dependency>
    <groupId>com.amazonaws</groupId>
    <artifactId>aws-java-sdk-s3</artifactId>
    <version>1.12.423</version>
</dependency>
本项目的 Pom 文件
<?xml version="1.0" encoding="UTF-8"?>
<project xmlns="http://maven.apache.org/POM/4.0.0" xmlns:xsi="http://www.w3.org/2001/XMLSchema-instance"
         xsi:schemaLocation="http://maven.apache.org/POM/4.0.0 https://maven.apache.org/xsd/maven-4.0.0.xsd">
    <modelVersion>4.0.0</modelVersion>
    <parent>
        <groupId>org.springframework.boot</groupId>
        <artifactId>spring-boot-starter-parent</artifactId>
        <version>2.7.9</version>
        <relativePath/> <!-- lookup parent from repository -->
    </parent>
    <groupId>com.qing</groupId>
    <artifactId>oss-spring-boot-starter</artifactId>
    <version>0.0.1-SNAPSHOT</version>
    <name>oss-spring-boot-starter</name>
    <description>Demo oss-spring-boot-starter</description>
    <properties>
        <java.version>1.8</java.version>
        <aws.version>1.12.423</aws.version>
        <hutool.version>5.8.5</hutool.version>
    </properties>
    <dependencies>
        <dependency>
            <groupId>org.springframework.boot</groupId>
            <artifactId>spring-boot-starter</artifactId>
        </dependency>
        <!-- https://mvnrepository.com/artifact/com.amazonaws/aws-java-sdk-s3 -->
        <dependency>
            <groupId>com.amazonaws</groupId>
            <artifactId>aws-java-sdk-s3</artifactId>
            <version>${aws.version}</version>
        </dependency>
        <dependency>
            <groupId>cn.hutool</groupId>
            <artifactId>hutool-core</artifactId>
            <version>${hutool.version}</version>
        </dependency>
        <dependency>
            <groupId>org.springframework.boot</groupId>
            <artifactId>spring-boot-starter-test</artifactId>
            <scope>test</scope>
        </dependency>
        <dependency>
            <groupId>org.projectlombok</groupId>
            <artifactId>lombok</artifactId>
            <version>RELEASE</version>
            <scope>compile</scope>
        </dependency>
    </dependencies>

</project>
编写 OssProperties
代码如下,注释写的非常清楚了。
-
@ConfigurationProperties报红不用管后门会解决。 -
@Data:注解是 lombok,生成 get set 方法的。 -
@ConfigurationProperties(prefix = "oss"):将配置文件中 oss 开头的属性绑定到此对象中
大概就是如果想要使用我们的 jar 他的配置文件有这些配置
oss.endpoint=xxx
oss.accessKey=xxx
oss.secretKey=xxx
/**
 * @Author JiaQIng
 * @Description Oss配置类
 * @ClassName OssProperties
 * @Date 2023/3/18 17:51
 **/
@Data
@ConfigurationProperties(prefix = "oss")
public class OssProperties {
    /**
     * 对象存储服务的URL
     */
    private String endpoint;

    /**
     * 区域
     */
    private String region;

    /**
     * true path-style nginx 反向代理和S3默认支持 pathStyle模式 {http://endpoint/bucketname}
     * false supports virtual-hosted-style 阿里云等需要配置为 virtual-hosted-style 模式{http://bucketname.endpoint}
     * 只是url的显示不一样
     */
    private Boolean pathStyleAccess = true;

    /**
     * Access key
     */
    private String accessKey;

    /**
     * Secret key
     */
    private String secretKey;

    /**
     * 最大线程数,默认:100
     */
    private Integer maxConnections = 100;
}
创建一个接口 OssTemplate
OssTemplate:oss 模板接口,此接口主要是对 oss 操作的方法的一个接口,定义为接口主要是满足可扩展原则,就是其他人使用了我们的 jar 包,实现此接口可以自定义相关操作。
如下面所示代码:定义了一些对 oss 操作的方法。
/**
 * @Author JiaQIng
 * @Description oss操作模板
 * @ClassName OssTemplate
 * @Date 2023/3/18 18:15
 **/
public interface OssTemplate {

    /**
     * 创建bucket
     * @param bucketName bucket名称
     */
    void createBucket(String bucketName);

    /**
     * 获取所有的bucket
     * @return
     */
    List<Bucket> getAllBuckets();

    /**
     * 通过bucket名称删除bucket
     * @param bucketName
     */
    void removeBucket(String bucketName);

    /**
     * 上传文件
     * @param bucketName bucket名称
     * @param objectName 文件名称
     * @param stream 文件流
     * @param contextType 文件类型
     * @throws Exception
     */
    void putObject(String bucketName, String objectName, InputStream stream, String contextType) throws Exception;

    /**
     * 上传文件
     * @param bucketName bucket名称
     * @param objectName 文件名称
     * @param stream 文件流
     * @throws Exception
     */
    void putObject(String bucketName, String objectName, InputStream stream) throws Exception;

    /**
     * 获取文件
     * @param bucketName bucket名称
     * @param objectName 文件名称
     * @return S3Object
     */
    S3Object getObject(String bucketName, String objectName);

    /**
     * 获取对象的url
     * @param bucketName
     * @param objectName
     * @param expires
     * @return
     */
    String getObjectURL(String bucketName, String objectName, Integer expires);

    /**
     * 通过bucketName和objectName删除对象
     * @param bucketName
     * @param objectName
     * @throws Exception
     */
    void removeObject(String bucketName, String objectName) throws Exception;

    /**
     * 根据文件前置查询文件
     * @param bucketName bucket名称
     * @param prefix 前缀
     * @param recursive 是否递归查询
     * @return S3ObjectSummary 列表
     */
    List<S3ObjectSummary> getAllObjectsByPrefix(String bucketName, String prefix, boolean recursive);
}
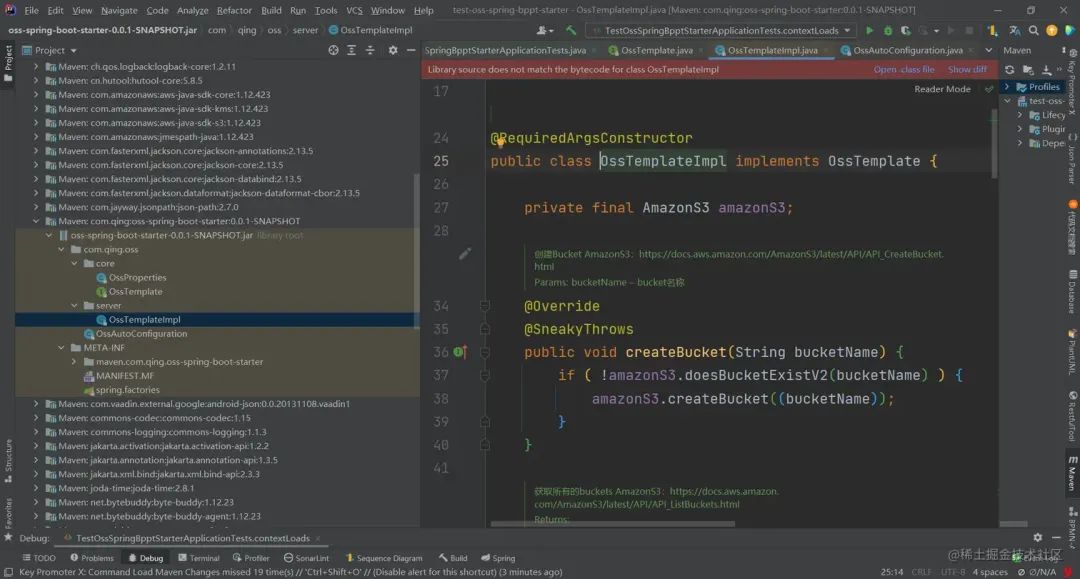
创建 OssTemplate 的实现类
如下图所示:实现 OssTemplate 里面的方法,调用 AmazonS3JavaSDK 的方法实现。
AmazonS3 提供了众多的方法,这里就不写全部的了,公司要用到那些就写那些吧,后续扩展就行。
AmazonS3 接口地址: https://docs.aws.amazon.com/AmazonS3/latest/API/API_CreateBucket.html 。
此类解释:就是实现 OssTemplate 接口,引入 AmazonS3 客户端调用对应的接口。
使用的注解解释:
-
@RequiredArgsConstructor:lomnok 的注解,替代@Autowired。 -
@SneakyThrows:lomnok 的注解,抛出异常。
/**
 * @Author JiaQIng
 * @Description OssTemplate的实现类
 * @ClassName OssTemplateImpl
 * @Date 2023/3/18 19:02
 **/
@RequiredArgsConstructor
public class OssTemplateImpl implements OssTemplate {

    private final AmazonS3 amazonS3;

    /**
     * 创建Bucket
     * AmazonS3:https://docs.aws.amazon.com/AmazonS3/latest/API/API_CreateBucket.html
     * @param bucketName bucket名称
     */
    @Override
    @SneakyThrows
    public void createBucket(String bucketName) {
        if ( !amazonS3.doesBucketExistV2(bucketName) ) {
            amazonS3.createBucket((bucketName));
        }
    }

    /**
     * 获取所有的buckets
     * AmazonS3:https://docs.aws.amazon.com/AmazonS3/latest/API/API_ListBuckets.html
     * @return
     */
    @Override
    @SneakyThrows
    public List<Bucket> getAllBuckets() {
        return amazonS3.listBuckets();
    }

    /**
     * 通过Bucket名称删除Bucket
     * AmazonS3:https://docs.aws.amazon.com/AmazonS3/latest/API/API_DeleteBucket.html
     * @param bucketName
     */
    @Override
    @SneakyThrows
    public void removeBucket(String bucketName) {
        amazonS3.deleteBucket(bucketName);
    }

    /**
     * 上传对象
     * @param bucketName bucket名称
     * @param objectName 文件名称
     * @param stream 文件流
     * @param contextType 文件类型
     * AmazonS3:https://docs.aws.amazon.com/AmazonS3/latest/API/API_PutObject.html
     */
    @Override
    @SneakyThrows
    public void putObject(String bucketName, String objectName, InputStream stream, String contextType) {
        putObject(bucketName, objectName, stream, stream.available(), contextType);
    }
    /**
     * 上传对象
     * @param bucketName bucket名称
     * @param objectName 文件名称
     * @param stream 文件流
     * AmazonS3:https://docs.aws.amazon.com/AmazonS3/latest/API/API_PutObject.html
     */
    @Override
    @SneakyThrows
    public void putObject(String bucketName, String objectName, InputStream stream) {
        putObject(bucketName, objectName, stream, stream.available(), "application/octet-stream");
    }

    /**
     * 通过bucketName和objectName获取对象
     * @param bucketName bucket名称
     * @param objectName 文件名称
     * @return
     * AmazonS3:https://docs.aws.amazon.com/AmazonS3/latest/API/API_GetObject.html
     */
    @Override
    @SneakyThrows
    public S3Object getObject(String bucketName, String objectName) {
        return amazonS3.getObject(bucketName, objectName);
    }

    /**
     * 获取对象的url
     * @param bucketName
     * @param objectName
     * @param expires
     * @return
     * AmazonS3:https://docs.aws.amazon.com/AmazonS3/latest/API/API_GeneratePresignedUrl.html
     */
    @Override
    @SneakyThrows
    public String getObjectURL(String bucketName, String objectName, Integer expires) {
        Date date = new Date();
        Calendar calendar = new GregorianCalendar();
        calendar.setTime(date);
        calendar.add(Calendar.DAY_OF_MONTH, expires);
        URL url = amazonS3.generatePresignedUrl(bucketName, objectName, calendar.getTime());
        return url.toString();
    }

    /**
     * 通过bucketName和objectName删除对象
     * @param bucketName
     * @param objectName
     * AmazonS3:https://docs.aws.amazon.com/AmazonS3/latest/API/API_DeleteObject.html
     */
    @Override
    @SneakyThrows
    public void removeObject(String bucketName, String objectName) {
        amazonS3.deleteObject(bucketName, objectName);
    }

    /**
     * 根据bucketName和prefix获取对象集合
     * @param bucketName bucket名称
     * @param prefix 前缀
     * @param recursive 是否递归查询
     * @return
     * AmazonS3:https://docs.aws.amazon.com/AmazonS3/latest/API/API_ListObjects.html
     */
    @Override
    @SneakyThrows
    public List<S3ObjectSummary> getAllObjectsByPrefix(String bucketName, String prefix, boolean recursive) {
        ObjectListing objectListing = amazonS3.listObjects(bucketName, prefix);
        return objectListing.getObjectSummaries();
    }


    /**
     *
     * @param bucketName
     * @param objectName
     * @param stream
     * @param size
     * @param contextType
     * @return
     */
    @SneakyThrows
    private PutObjectResult putObject(String bucketName, String objectName, InputStream stream, long size,
                                     String contextType)  {

        byte[] bytes = IOUtils.toByteArray(stream);
        ObjectMetadata objectMetadata = new ObjectMetadata();
        objectMetadata.setContentLength(size);
        objectMetadata.setContentType(contextType);
        ByteArrayInputStream byteArrayInputStream = new ByteArrayInputStream(bytes);
        // 上传
        return amazonS3.putObject(bucketName, objectName, byteArrayInputStream, objectMetadata);

    }
}
创建 OssAutoConfiguration
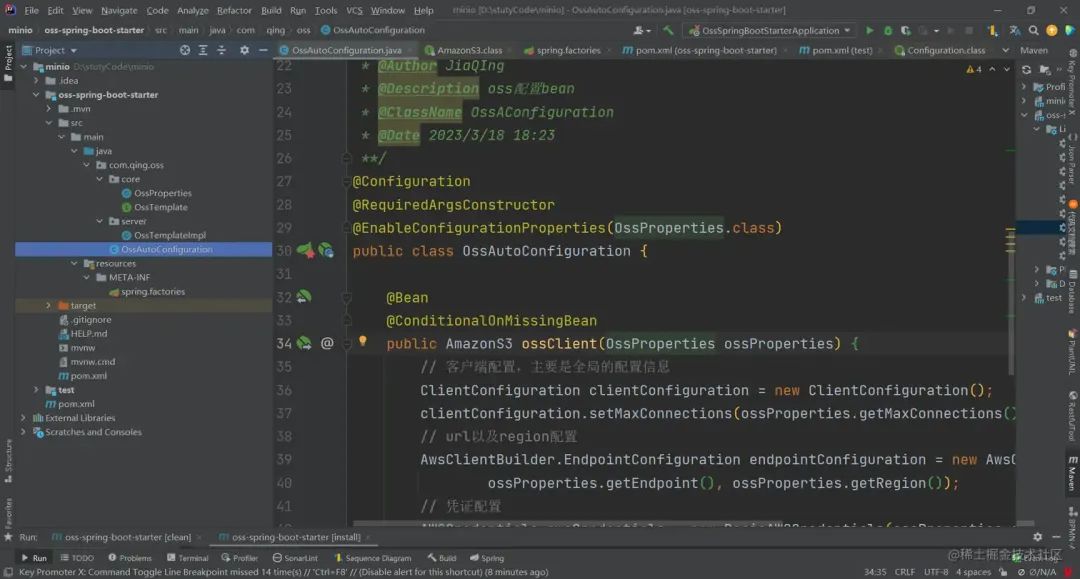
OssAutoConfiguration:自动装配配置类,自动装配的 bean 有 AmazonS3 和 OssTemplate
所使用的注解:
-
@RequiredArgsConstructor:lomnok 的注解,替代@Autowired。 -
@EnableConfigurationProperties(OssProperties.class):自动装配我们的配置类。 -
@Bean:声明式 bean。 -
@ConditionalOnMissingBean:修饰 bean 的一个注解,当你的 bean 被注册之后,注册相同类型的 bean,就不会成功,它会保证你的 bean 只有一个,即你的实例只有一个。多个会报错。 -
@ConditionalOnBean(AmazonS3.class):当给定的在 bean 存在时,则实例化当前 Bean。
/**
 * @Author JiaQIng
 * @Description oss配置bean
 * @ClassName OssAConfiguration
 * @Date 2023/3/18 18:23
 **/
@Configuration
@RequiredArgsConstructor
@EnableConfigurationProperties(OssProperties.class)
public class OssAutoConfiguration {

    @Bean
    @ConditionalOnMissingBean
    public AmazonS3 ossClient(OssProperties ossProperties) {
        // 客户端配置,主要是全局的配置信息
        ClientConfiguration clientConfiguration = new ClientConfiguration();
        clientConfiguration.setMaxConnections(ossProperties.getMaxConnections());
        // url以及region配置
        AwsClientBuilder.EndpointConfiguration endpointConfiguration = new AwsClientBuilder.EndpointConfiguration(
                ossProperties.getEndpoint(), ossProperties.getRegion());
        // 凭证配置
        AWSCredentials awsCredentials = new BasicAWSCredentials(ossProperties.getAccessKey(),
                ossProperties.getSecretKey());
        AWSCredentialsProvider awsCredentialsProvider = new AWSStaticCredentialsProvider(awsCredentials);
        // build amazonS3Client客户端
        return AmazonS3Client.builder().withEndpointConfiguration(endpointConfiguration)
                .withClientConfiguration(clientConfiguration).withCredentials(awsCredentialsProvider)
                .disableChunkedEncoding().withPathStyleAccessEnabled(ossProperties.getPathStyleAccess()).build();
    }

    @Bean
    @ConditionalOnBean(AmazonS3.class)
    public OssTemplate ossTemplate(AmazonS3 amazonS3){
        return new OssTemplateImpl(amazonS3);
    }
}
ClientConfiguration 对象
客户端配置,主要是全局的配置信息
看下图,有很多的配置,有的指定了默认值有的没有,可以到 AmazonS3 的官方文档熟悉相关配置,配置你所需要指定的配置信息等。
只有你真正的理解那些配置的作用才能避免线上的 bug。 有兴趣的同学可以看一下。

创建我们的 spring.factories
在 resources 目录下新增 META-INF 包,下面新建spring.factories文件。
这种形式也是”约定大于配置”的体现。读过 spring-boot 源码的同学应该知道,这里就不给大家讲解了。
如下图所示:
org.springframework.boot.autoconfigure.EnableAutoConfiguration=\
  com.qing.oss.OssAutoConfiguration
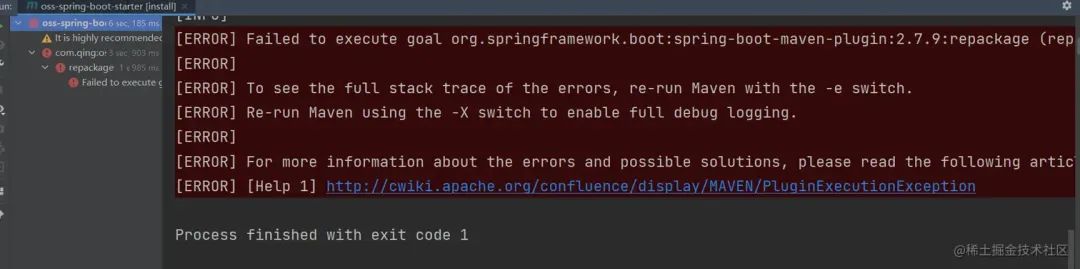
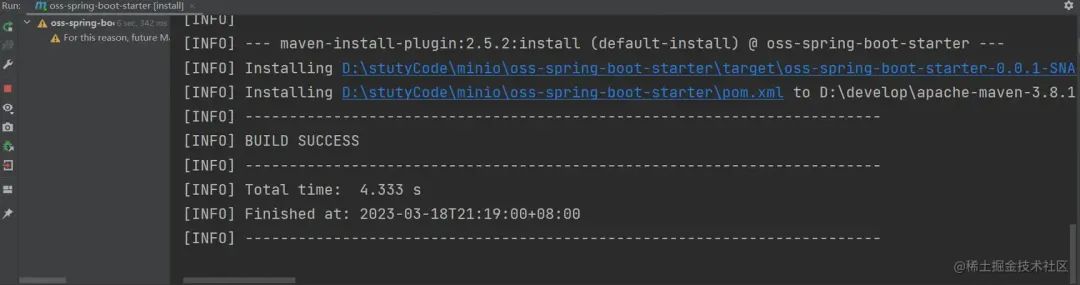
执行 install 打包到我们的本地仓库
把 springboot 工程的启动类,配置文件干掉,干掉 Test 包。
最重要的是干掉 pom 文件的 spring-boot-maven-plugin,要不然 install 报错。
<build>
    <plugins>
        <plugin>
            <groupId>org.springframework.boot</groupId>
            <artifactId>spring-boot-maven-plugin</artifactId>
        </plugin>
    </plugins>
</build>
这样我们的一个 oss-spring-boot-starter 就完成了。
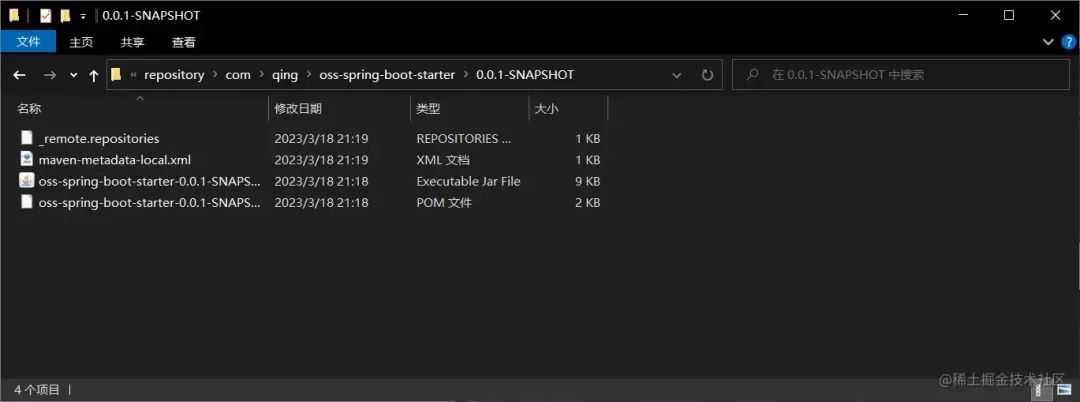
执行 install 打包成 jar 到我们的本地仓库。
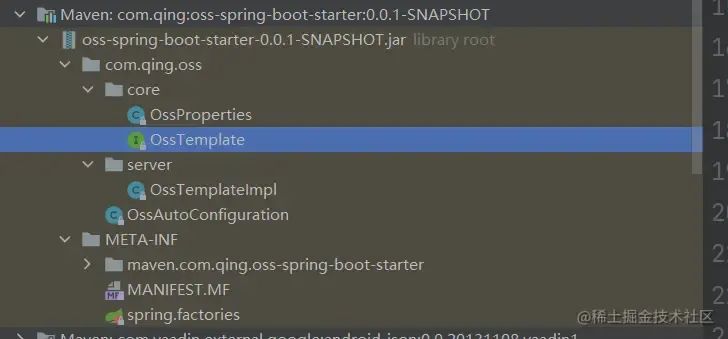
到我们的本地仓库就能看到我们的 oss-spring-boot-starter
测试
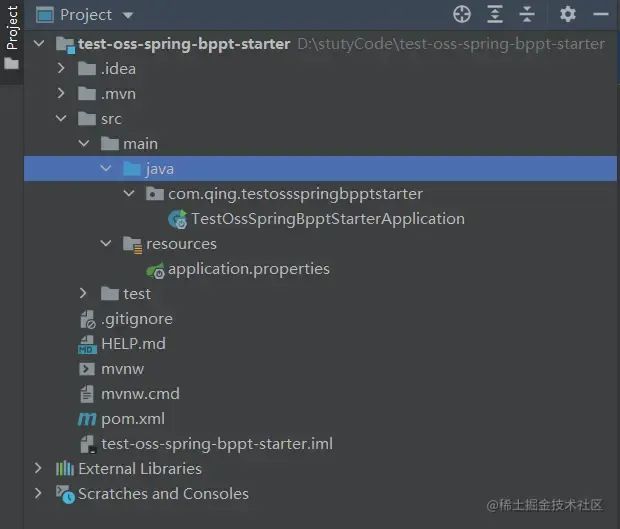
创建一个 spring-boot 工程当作我们的测试工程
这里就不演示怎么创建项目了。直接看下图吧
pom 文件新增我们的 oss-spring-boot-starter 依赖
新增版本全局配置
    <properties>
        <oss.version>0.0.1-SNAPSHOT</oss.version>
    </properties>
新增 oss-spring-boot-starter 依赖
        <dependency>
            <groupId>com.qing</groupId>
            <artifactId>oss-spring-boot-starter</artifactId>
            <version>${oss.version}</version>
        </dependency>
刷新 maven 后可以看到我们依赖加进来了。
解决打包没有注释的问题
可以发现我们的依赖没有注释没有 Javadoc 注释。
在我们的 oss-string-boot-starter 的 pom 文件下加入下面插件,重新 install 一下就好了。
    <build>
        <plugins>
            <!-- 在打好的jar包中保留javadoc注释,实际会另外生成一个xxxxx-sources.jar -->
            <plugin>
                <groupId>org.apache.maven.plugins</groupId>
                <artifactId>maven-source-plugin</artifactId>
                <executions>
                    <execution>
                        <id>attach-sources</id>
                        <goals>
                            <goal>jar</goal>
                        </goals>
                    </execution>
                </executions>
            </plugin>
        </plugins>
    </build>
在我们的测试项目里面刷新一下 maven 可以看到已经带注释了。
配置文件添加 oss-spring-boot-starter 所需要的配置
这里填写你的阿里云,腾讯 cos,七牛云,minio 等等的配置。
下面我给大家演示的是 Minio
oss.endpoint=xxx
oss.accessKey=xxx
oss.secretKey=xxx
编写测试方法
如下图所示,编写测试方法,执行测试方法成功。
@SpringBootTest
class TestOssSpringBpptStarterApplicationTests {
    @Autowired
    private OssTemplate ossTemplate;

    @Test
    void contextLoads() {
        ossTemplate.createBucket("oss02");
    }

}
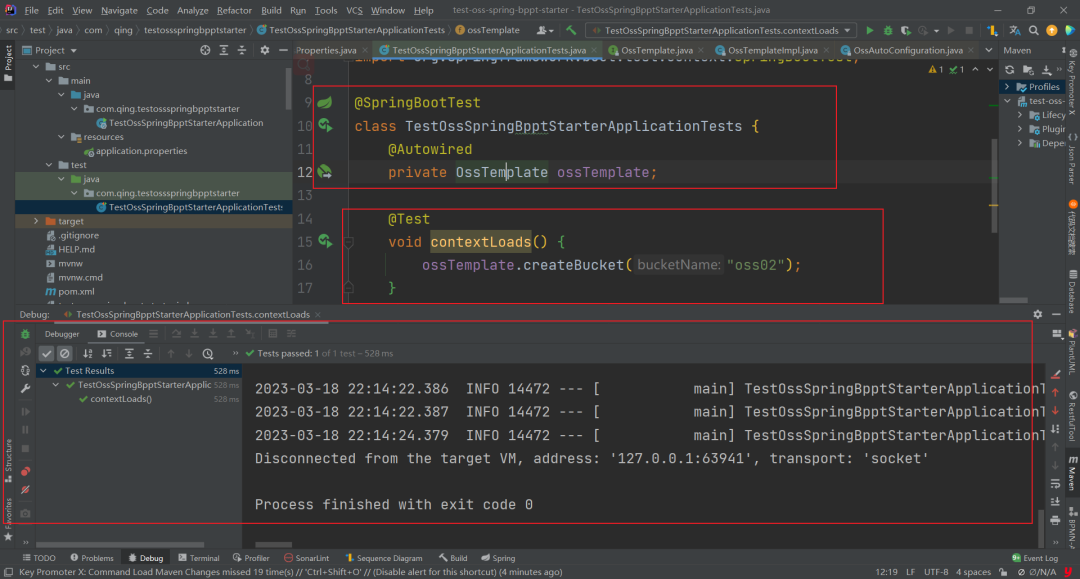
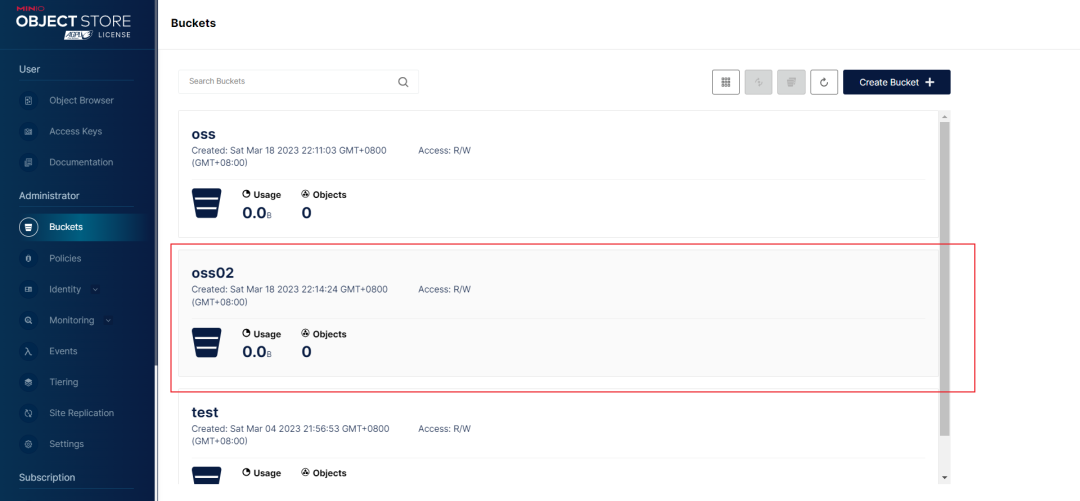
到我的 Minio 中查看发现测试成功。
后记
本文主要讲解企业级 OSS 对象存储服务 Spring Boot Starter 制作,开箱即用,为项目进行赋能。基于 AmazonS3 协议,适配市面上的大部分对象存储服务如:阿里云 OSS、腾讯 COS、七牛云 OSS、MInio 等等
源码地址:https://github.com/hujiaqing789/test-spring-boot-starter.git 。
扫码领红包作者:佳庆
链接:https://juejin.cn/post/7211828279430021180
 微信赞赏
微信赞赏 支付宝扫码领红包